Abhishek Prakash
Lightning Web Components : The Complete Beginner's Guide
12 April 2020 • 7 min read • 1225 words
This blog is for anyone who wants to learn Lightning Web Components basics, and is focused towards beginners. I am assuming reader has basic knowledge of Salesforce. Although screenshots are from windows machine, this tutorial will work for any platform.
Table of Contents
- Introduction/Background
- Prerequisites
- Setup with VSCode
- Creating first LWC Component
- Deploying your component
- Testing component in org
Introduction/Background
LWC or lightning web component is a newly created technology of salesforce introduced in Feb 2019. LWC uses native web features and support full JavaScript features unlike Aura Components which supports only subset of features.
Following are highlighting point of LWC :-
- It is build upon the web components standard defined by w3c.
- It runs natively in browser and is lightweight.
-
It consists of HTML, JavaScript and CSS files.
- HTML provides the structure for your component.
- JavaScript defines the core business logic and event handling.
- CSS provides the look, feel, and animation for your component.
- You cannot write or see code for LWC in Salesforce directly, you need to use Saleforce CLI to deploy code to your org.
- You can try/test your components in playground created by Salesforce.
LWC is not limited to Salesforce and can be used for projects outside Salesforce using Open Source version, you can find more about it here.
Prerequisites
These are the following things that you will need.
- Access to Developer Org, you can create a new one for free here.
- VSCode (Preferred choice of IDE, as suggested by Salesforce).
- Salesforce Extensions Pack VSCode Extension. It needs to be installed in VSCode (we will cover this in below section).
-
Salesforce CLI app
-
Enable Dev Hub in Developer org. Dev Hub is a hub which can host multiple Scratch Orgs. Scractch Orgs is a new concept by Salesforce, it is a blank Salesforce org where we can create and test our LWC components without affecting our organization. It is recommended way of creating LWC components but we can also do it in our production orgs.
Following are the steps for enabling Dev Hub in our org :-
- Go to Setup.
- Search for Dev Hub .
- Click on switch Enable Dev Hub.
- It cannot be disabled once it is enabled.
A Dev Hub enabled org can contain multiple Scratch Orgs.
Setup with VSCode
We need to use VSCode for LWC Development, it cannot be done in developer console as of now.
Follow below steps for setup :-
Step 1 : Download and install Salesforce CLI using link provided above, as per your platform.
Step 2 : Install VSCode using link provided above.
Step 3 : After installing VSCode using above link, we will now install VSCode Extension Pack extension
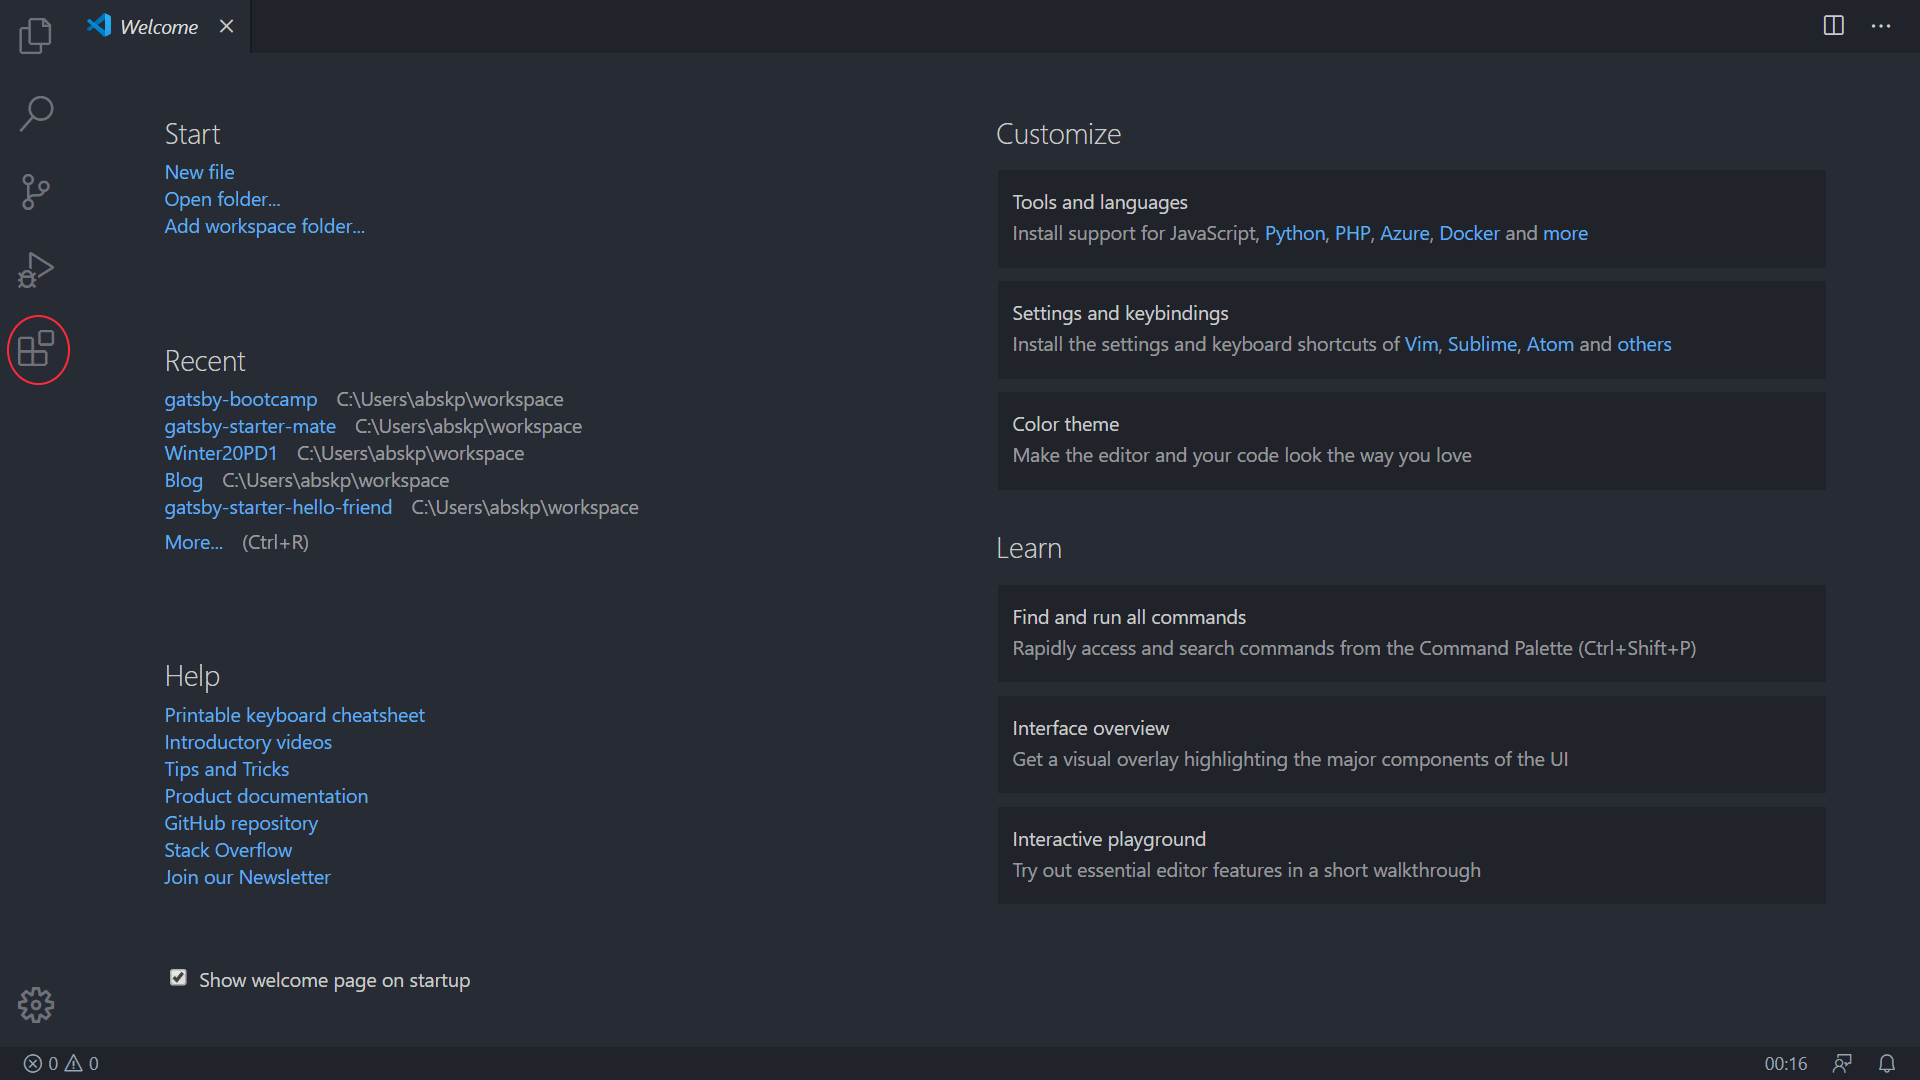
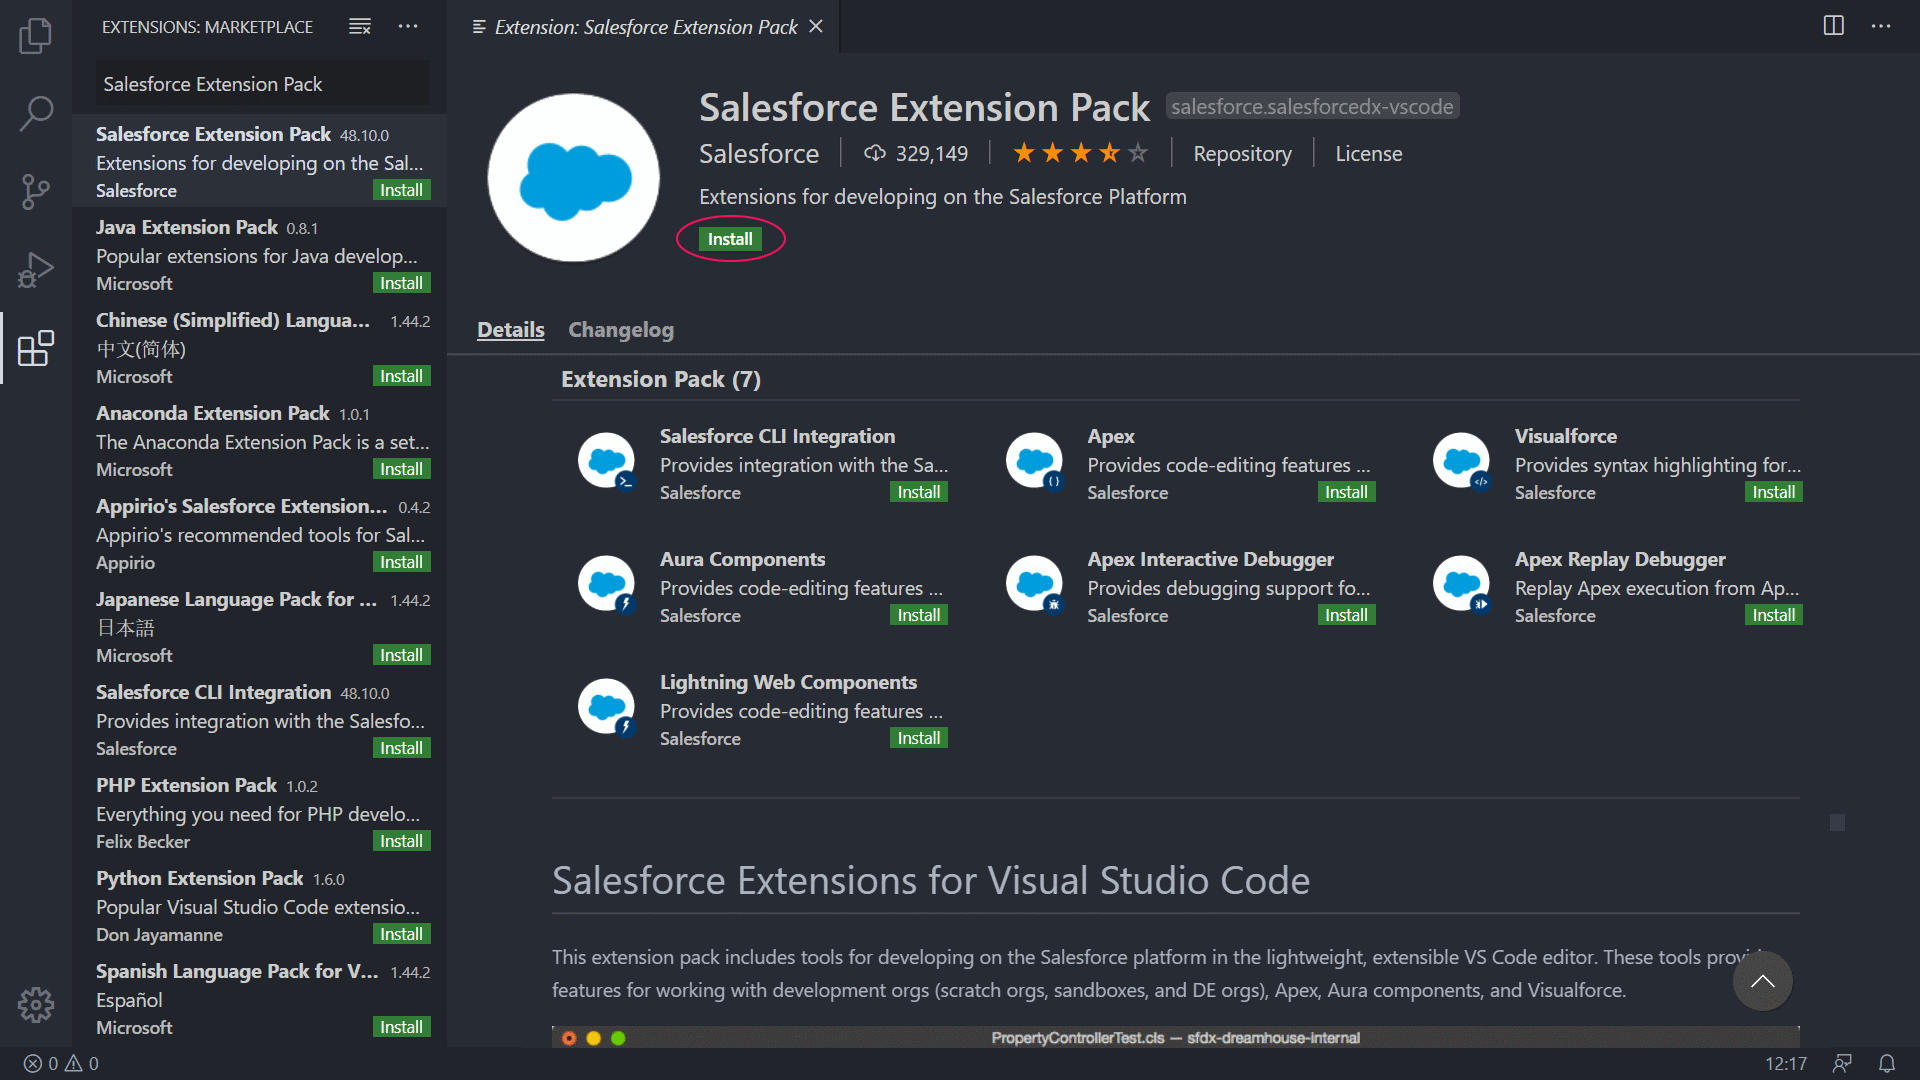
Click on Extensions, use red circle in above image for reference and search for Salesforce Extension Pack and Install the extension.
Creating first LWC Component
Now we are coming to main part, creating your first LWC Component.
Step 1: For this part first we will create a new project. For this just type Ctrl + Shift + P at once and command palette will open, type SFDX: and you will see list of SFDX commands, choose SFDX: Create Project

For templates choose standard on next screen, for name you can put any thing, we will put First Project and then specify directory and click Create Project. A new project will be created by the extension.
Step 2 : Open Command Palette again and type SFDX : Create Lightning Web Component and for name give firstComponent. When we create the new LWC Component bundle, by default it will contain 3 files and will look something like this.
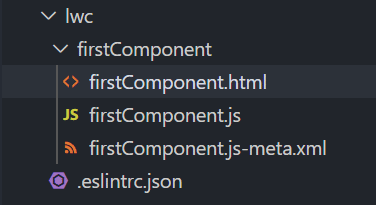
In above image html file will contain all the html part, similarly js file will contain all the JavaScript related to the bundle and the last file firstComponent.js-meta.xml will contain all the meta information about the bundle, we can also create a css file if required (with the same name as bundle with .css at end).
Here JavaScript and js-meta.xml files are mandatory and all other files are optional. Meta files will contain information like API version used for the bundle and where it can be used.
Step 3 : We will modify the firstComponent.html file to include some content. Copy and paste following . We write all our HTML code under a template tag.
<!--firstComponent.html-->
<template>
	<lightning-card title = "My First Project">
		<p>This is my first Component</p>
	</lightning-card>
</template>
We will also modify meta.xml file so that we can use it in our app or record pages.
<?xml version="1.0" encoding="UTF-8" ?>
<LightningComponentBundle xmlns="http://soap.sforce.com/2006/04/metadata">
    <apiVersion>48.0</apiVersion>
    <isExposed>true</isExposed>
    <targets>
        <target>lightning__AppPage</target>
        <target>lightning__RecordPage</target>
        <target>lightning__HomePage</target>
        <target>lightningCommunity__Page</target>
    </targets>
</LightningComponentBundle>
Here we have made isExposed property to true, which means it is available to be used within app builder pages outside our namespace. We have also added targets, which indicates where this LWC component can be placed.
Deploying your Component
We need to deploy the component before we can use it in our org. Follow below steps to deploy the component we just created.
Step 1 : We will authorize our Dev Hub enabled org in VSCode so that we can deploy our code. Open the command Palette again and type SFDX: Authorize a Dev Hub. It will redirect to login page in your browser, after login it will direct to a permission page asking to give permission to Salesforce CLI.
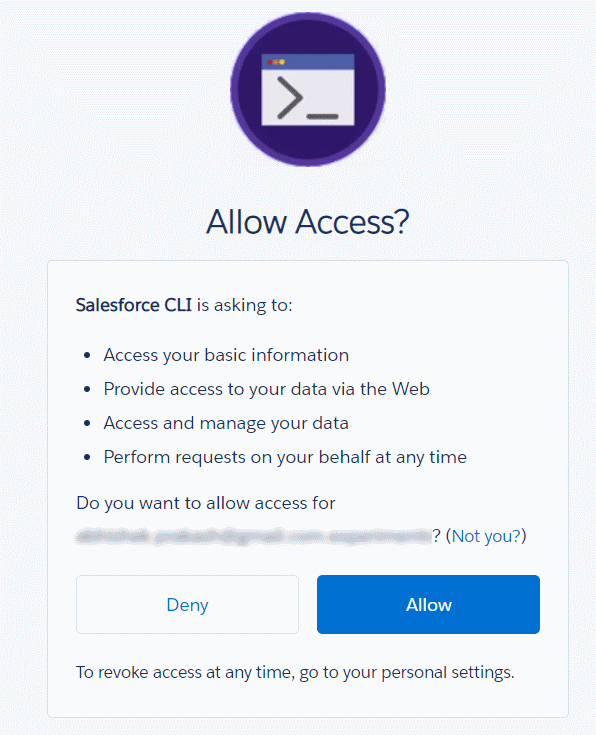
Click on Allow and it will redirect to you salesforce home page, you can close browser tab now.
Step 2 : We will create a scratch org in the current Dev Hub org, so that we can upload our lightning component. Open Command Palette (Ctrl + Shift + P) and type SFDX: Create a Default Scratch Org..., select the command and in next step just press enter to select the default json file for creating the scratch org.
In the next step we provide an alias (myscratchorg), after that there will be prompt for entering the number of days for which scratch org will be valid, you can press enter for default value 7 or you can enter anything between 1-30 and press enter. After the scratch org is created it will be automatically selected in vscode and you can see the selected org in the bottom bar.

There are two ways of deploying in scratch org, we can either right click in any of the bundle files or on bundle folder and select option SFDX: Deploy this Source to Org
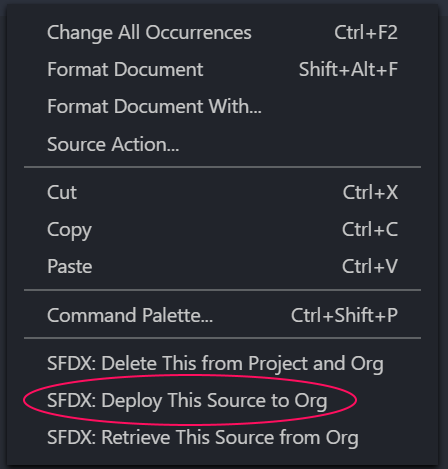
and if you are not getting this option then you an open the command prompt ( Ctrl + ` ) and type command sfdx force:source:push. This command will deploy our code to currently active org.
Testing component in org
Now it's time to reap fruits of our labor. In this section we will test our component in the org. We can do this by following below steps.
Step 1 : First we will open current org (scratch org in our case) by typing command sfdx force:org:open in command prompt ( Ctrl +` ).
Step 2 : Now we will create an app page for our component, go to setup and search Lightning App Builder, then click new on Lightning Pages section, select App Page, click next and put a label ( I used First Project ) and click next again, select One Region in the next section and click on Finish.
Step 3 : Drag the custom component firstComponent on the canvas
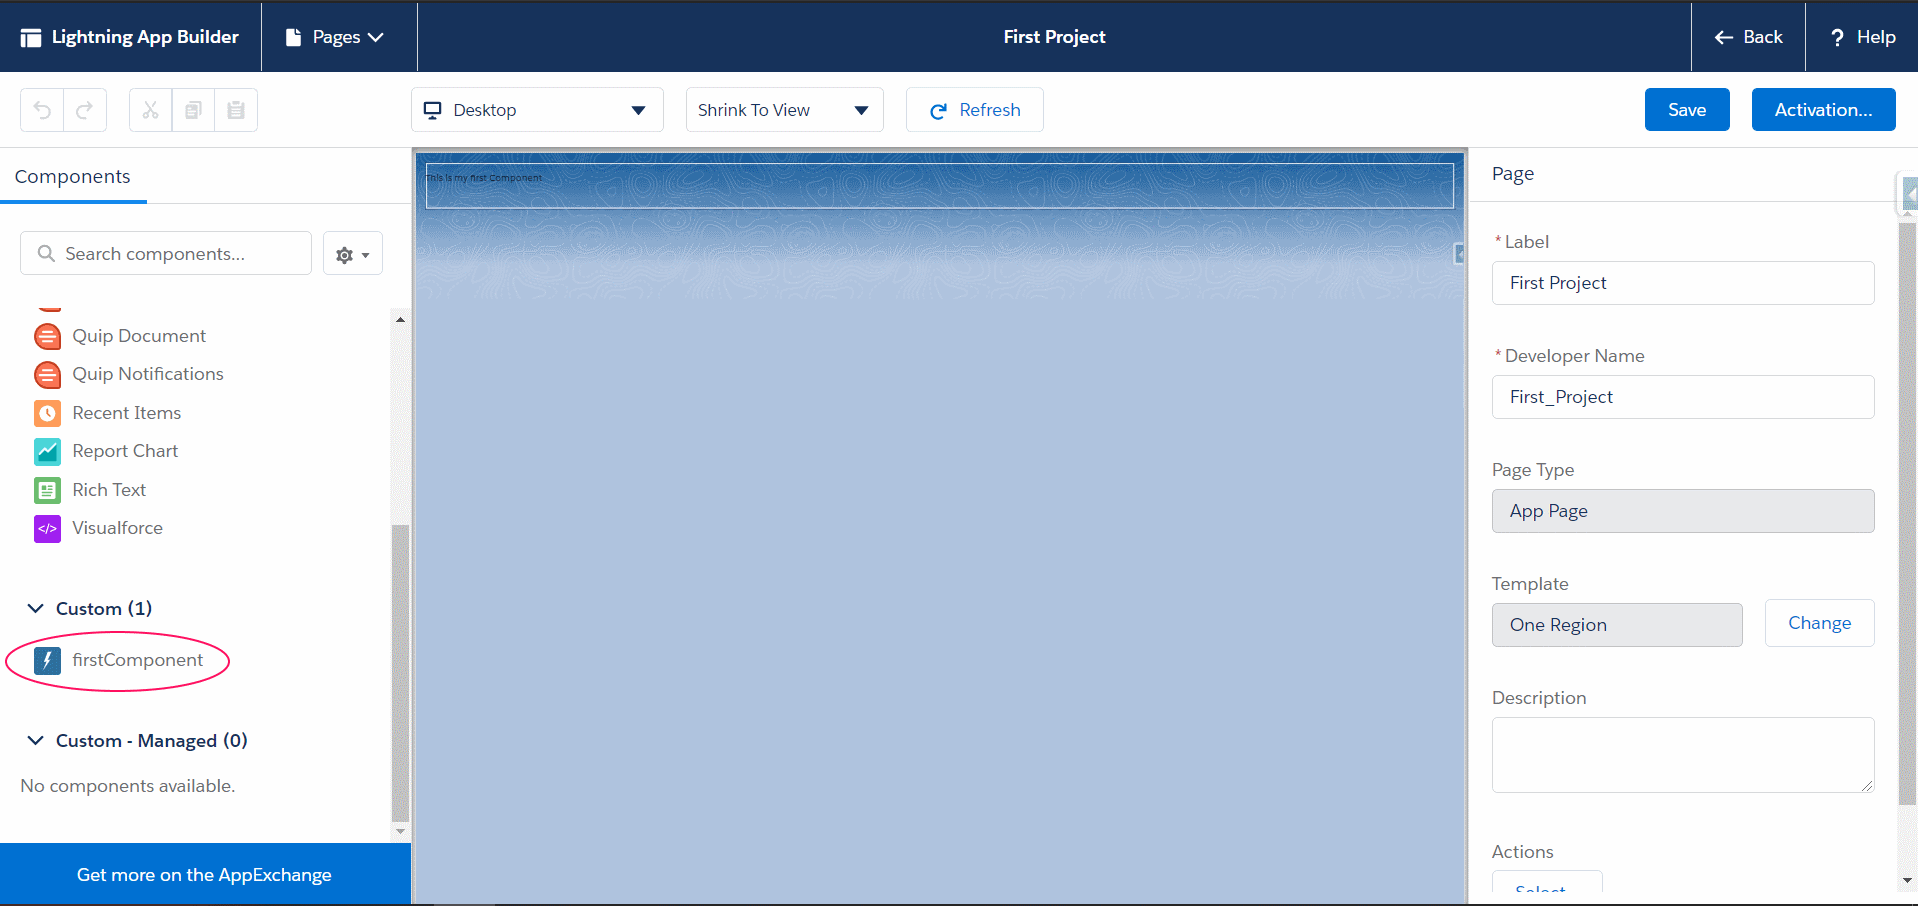
Save and Activate this App page for all users.
Step 4 : Go to App Launcher and choose First Project and we can see our LWC component in action.
Now we have successfully completed the basics of LWC.
![]() is a Salesforce Developer since 2017, living in Bengaluru, India. Know more about him here.
is a Salesforce Developer since 2017, living in Bengaluru, India. Know more about him here.