Abhishek Prakash
Connecting Google Drive to Salesforce using Named Credentials
06 May 2020 • 5 min read • 825 words
Named Credential is a feature in Salesforce which makes callouts easier than usual. Typically, for making a callout we have to do the following :-
- Add end point to the Remote Site Settings (mandatory for external sites).
- Handle authentication (if any) in code.
We can avoid all this and use Named Credential to make this process simpler, using which will provide us with following benefits :-
- Endpoint and authentication is handled in one place and we just have to use it to make callout.
- If we have to change endpoint for any reason, we can just change it in Named Credential instead of changing it in code (which could be messy if there are multiple occurences).
Now we will try to use Named Credential for the purpose of connecting Google Drive (as a proof of concept) and will fetch all the folder names. We have to do a couple of things to achieve this :-
-
Create account on Google Developer Console.
- Go to Google Dev Console.
- Sign in using your google credentials.
- Agree to Terms of Service and click continue (You have to do this step if this is your first time on Google Dev Console using this Google account).
- Go to Credentials and create a new project (Provide any name of your choosing for project name).
- Now Click on OAuth concent screen in the left pane.
- For User Type choose External.
- Provide any name of your choosing for Application Name and click on Save.
- Next we will enable Google Drive API
- Click on Dashboard in left pane.
- Click on + ENABLE APIS AND SERVICES.
- Search Google Drive API and select the same from search results.
- Click on Enable.
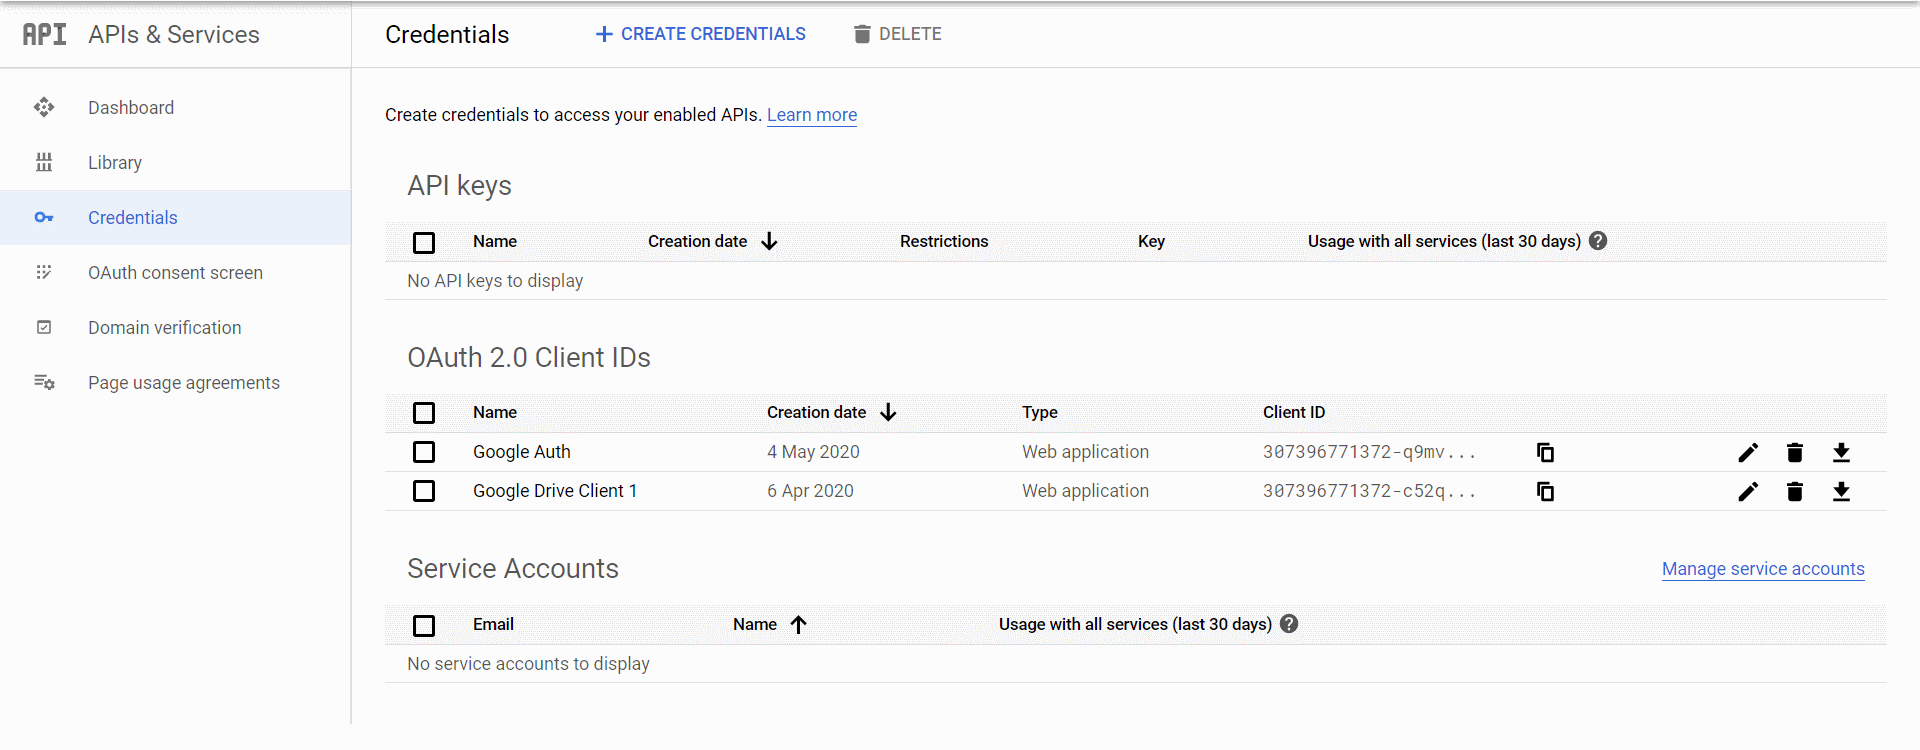
- Now click on Credentials in the left pane.
- Then click on the link on the top "To view all credentials or create new credentials visit Credentials in APIs & Services" then click on +CREATE CREDENTIALS and choose OAuth Client ID.
- For Application type choose Web application and provide a name of your choosing and click on Create.
- You will be provided with Client Id and Client Secret (we will need this for configuration in Salesforce).

-
Create Auth Provider in Salesforce
- Go to setup and search for Auth. Providers and open it.
- Click on New.
- Select Open ID Connect for Provider Type.
- In Name give any name (example GoogleAuth).
- In Consumer Key enter Client Id (which we generated in Google Dev Console).
- In Consumer Secret enter Client Secret (also generated in Google Dev Console).
- In Authorize Endpoint URL use https://accounts.google.com/o/oauth2/auth.
- In Token Endpoint URL put https://oauth2.googleapis.com/token.
- Click on Save and it will redirect to detail page.
-
Update callback URL in Google OAuth Credentials
- On Auth. Provider detail page there will be a section called Salesforce Cofiguration

- Copy Callback URL.
- Go to Credential detail page in Google Dev Console, click on + ADD URI in Authorised redirect URIs section and paste this value.
- Click on Save.
-
Now we will create Named Credential in Salesforce using following steps :-
- Go to Setup and search for Named Credentials.
- Click on New Named Credential.
- For Label give GoogleDrive.
- For URL use https://www.googleapis.com/drive/v2.
- For Identity Type choose Named Principal.
- Choose OAuth 2.0 for Authentication Protocol.
- For Authentication Provider choose GoogleAuth (we created auth provider in step 2).
- Check Start Authentication Flow on Save checkbox and click on Save.
- After save it will redirect to google login page, login with your account.
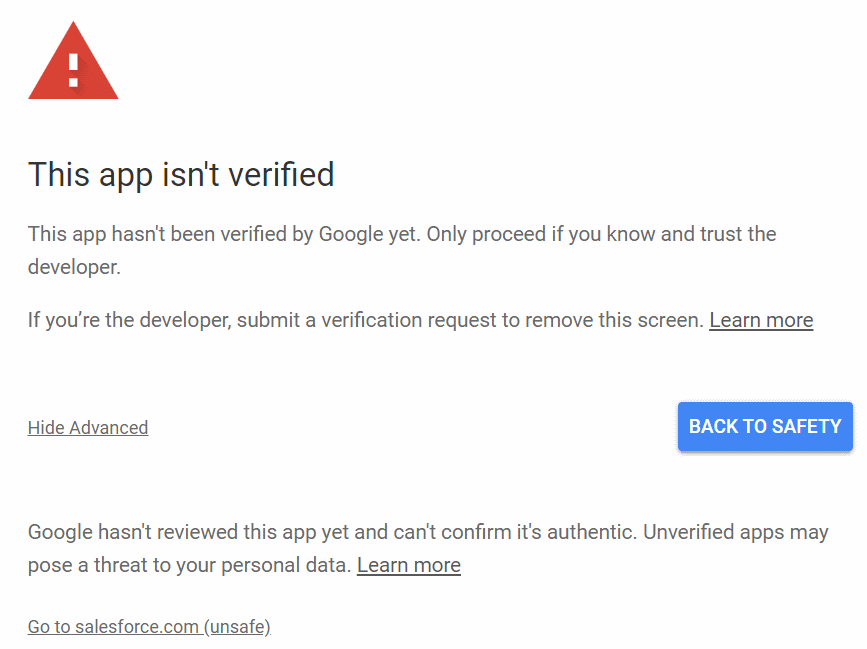
- It may or may not redirect to a security page.

- It may appear because any app with sensitive data access needs to go through Google verification process, which can take weeks. If it is a production app we should apply for verification but it if fine for the purposes of testing. If this screen appears, click on Advanced and then click on Proceed.
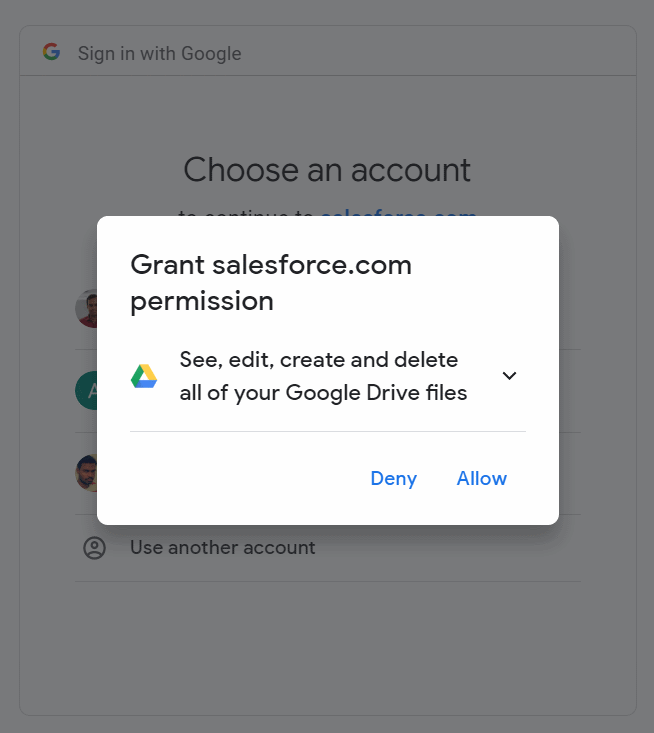
- Next we will get screen asking for permission to allow access to Google Drive.

- Click on Allow, next we will see a confirmation dialog, click Allow again.
- After this we will be redicted to Named Credential detail page. Here we will see Authentication Status as Authenticated.
Our Named Credential is ready for use, in the following steps we will make callout and get list of all the folders in our Google Drive Account.
-
Open Developer Console and create an apex class using below code.
public class GoogleDriveTest {

   public static void getAllFolders(){
       HttpRequest req = new HttpRequest();
       req.setEndPoint('callout:GoogleDrive/files/root/children');
       req.setMethod('GET');
       Http http = new Http();
       HTTPResponse res = http.send(req);
       System.debug(res.getBody());
   }
}
In above code we can see that for making a callout we just have to set endpoint as callout:NamedCredentialName/path
- Now open Anonymous window and call this method using
GoogleDriveTest.getAllFolders(); -
Open Logs and check the result, we will get result in the form of
{
"kind": "drive#childList",
"etag": "\"qmfy...tw\"",
"selfLink": "https://www.googleapis.com/drive/v2/files/root/children",
"items": [
 {
  "kind": "drive#childReference",
  "id": "1NO...2U",
  "selfLink": "https://www.googleapis.com/drive/v2/files/0A...VA/children/1NO...2U",
  "childLink": "https://www.googleapis.com/drive/v2/files/1NO...2U"
 },
 {
  "kind": "drive#childReference",
  "id": "14...O",
  "selfLink": "https://www.googleapis.com/drive/v2/files/0AP...VA/children/1496...WO",
  "childLink": "https://www.googleapis.com/drive/v2/files/1496...eL8WO"
 },
 {
  "kind": "drive#childReference",
  "id": "1Si...wwx",
  "selfLink": "https://www.googleapis.com/drive/v2/files/0AP...VA/children/1SiJDO....Kwwx",
  "childLink": "https://www.googleapis.com/drive/v2/files/1S....wwx"
 },
 {
  "kind": "drive#childReference",
  "id": "0B_m...Wxl",
  "selfLink": "https://www.googleapis.com/drive/v2/files/0AP...VA/children/0B_mGLkkn....Wxl",
  "childLink": "https://www.googleapis.com/drive/v2/files/0B_mG....xl"
 }
]
}
Note:- Since we are not setting scope for refresh_token in Auth. Provider, access to drive will expire after few minutes and we will have to go through authentication process again to test (just edit and save Named Credential to go through authentication process again).
References
![]() is a Salesforce Developer since 2017, living in Bengaluru, India. Know more about him here.
is a Salesforce Developer since 2017, living in Bengaluru, India. Know more about him here.